Welcome to our blog post on how to install a ring doorbell, your comprehensive guide to upgrading your home security system!
Whether you’re a tech-savvy homeowner or someone looking to enhance their safety, this step-by-step tutorial will walk you through the installation process with ease.
By the end of this article, you’ll have a clear understanding of how to mount your Ring doorbell, connect it to your Wi-Fi network, and make the most of its advanced features.
So, if you’re ready to level up your home security game, let’s dive in and learn how to install a ring doorbell like a pro!
Here’s How to Install a Ring Doorbell?
Let’s dive into how to install a Ring Doorbell in 12 easy steps. Don’t worry if DIY isn’t your thing, I’ve got your back!
We’ll break it down into super simple steps that even a beginner can tackle. By the end of this, you’ll have your doorstep all smartened up and secure. Ready? Let’s roll!
How to Install A Ring Doorbell in 12 Easy Steps
-
Step 1: Preparing the Battery

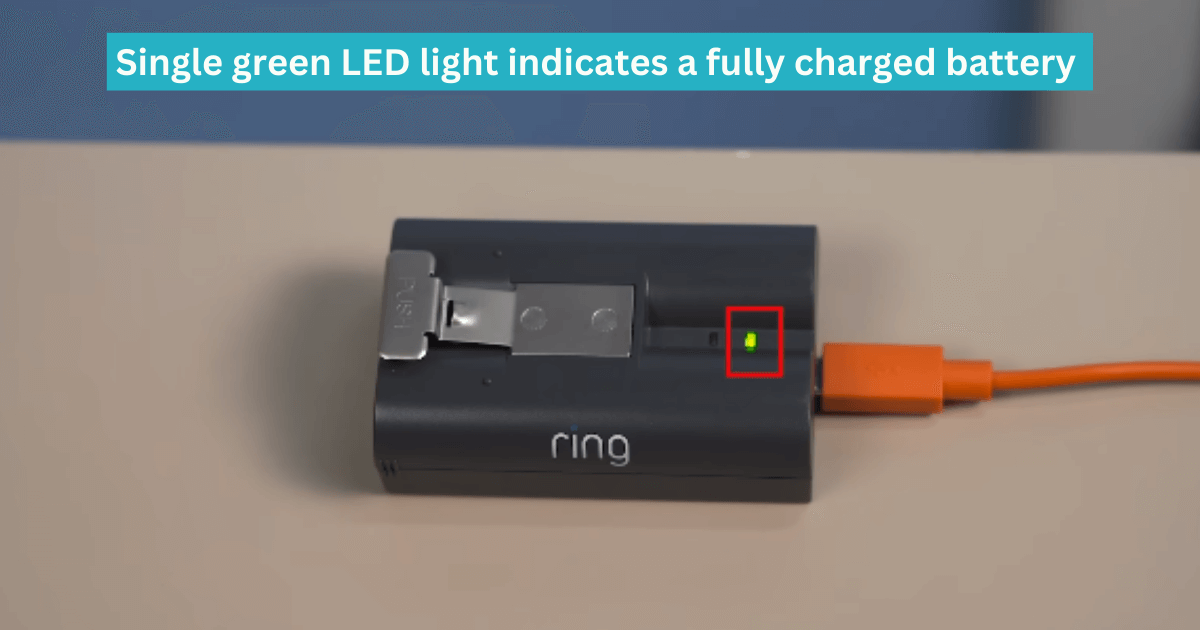
Let’s get started by making sure your Ring doorbell’s battery is ready to go. Grab the included battery and plug it into a USB port or power supply using the provided cable.
This will ensure that the battery is fully charged and ready for installation. It’s important to fully charge the battery before installing the ring doorbell. You can tell it’s fully charged when only one LED light is lit.
-
Step 2: Inserting the Battery
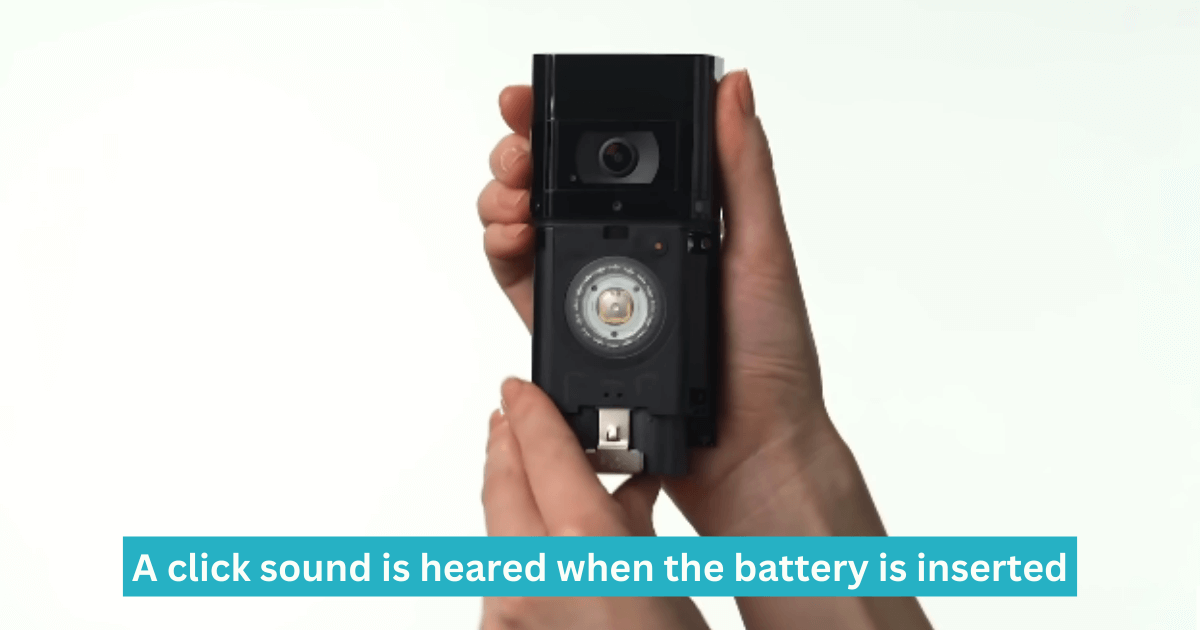
Now that your battery is charged, it’s time to insert it into your Ring doorbell. Slide the fully charged battery into its compartment until you hear a satisfying click sound.

This click indicates that the battery is securely in place and ready to power your doorbell.
-
Step 3: Setting Up the Ring App
Next, grab your smartphone or tablet and open the Ring app. This app will guide you through the setup process for your Ring doorbell.
Just follow the instructions provided within the app to properly configure your doorbell. The app will ensure that you have all the necessary settings in place for a seamless experience.
-
Step 4: Determining the Ideal Installation Height
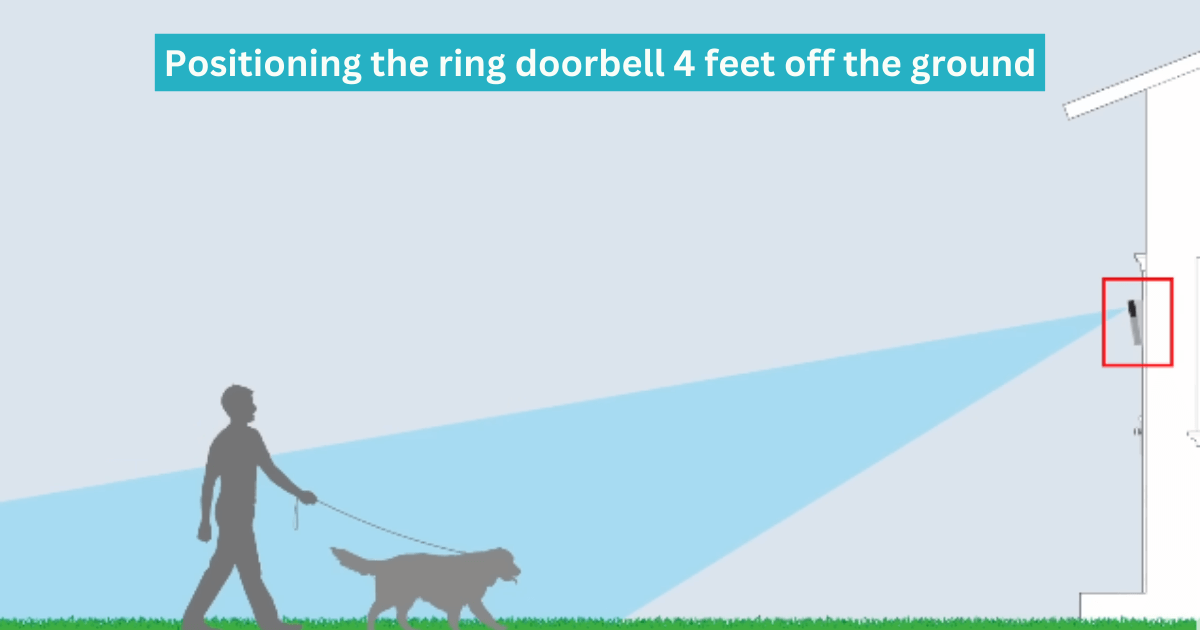
For optimal performance, it’s recommended to position your Ring doorbell at about four feet off the ground.

This height allows for a clear view and effective functionality. However, if your existing wiring is higher than four feet, don’t worry!
The package includes a wedge for ring doorbell that lets you angle the doorbell downwards, providing you with a better view.
-
Step 5: Pre-Installation Preparations
Before you begin to install a ring doorbell, make sure to turn off the power to your doorbell at the breaker. Safety first!
Then, remove your existing doorbell button from the wall and disconnect the wires. To ensure proper alignment, insert the included mini level into the designated slot on your video doorbell.
-
Step 6: Marking the Install Location

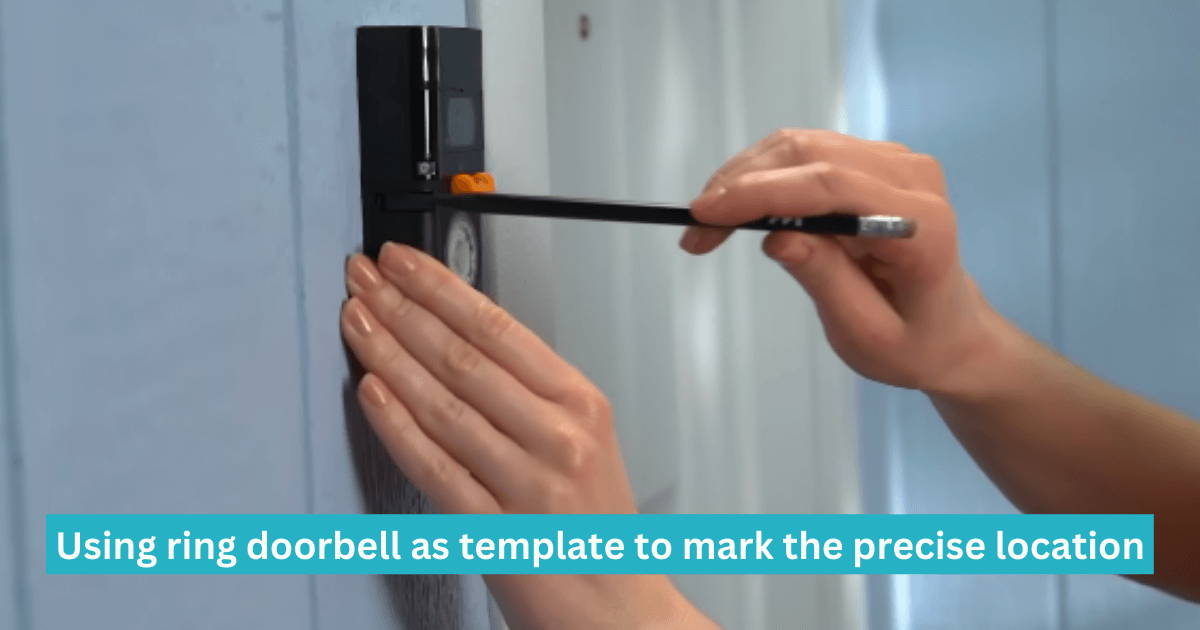
Now it’s time to mark the precise location for your Ring doorbell installation. Use the video doorbell itself as a template and center the bubble on the mini level. This will ensure that your doorbell will be perfectly straight when mounted.
-
Step 7: Drilling Holes (For Stucco, Brick, or Concrete)
If you’re mounting your Video Doorbell on stucco, brick, or concrete, you’ll need to create holes in the wall. Use the provided drill bit and carefully drill the holes at the marked locations.
Once the holes are ready, insert the included anchors. These anchors will provide a secure foundation for your doorbell. If you’re installing on wood or siding, you can skip this step.
- Step 8: Extending Doorbell Wires (If Necessary)
If your doorbell wires are too short to reach the video doorbell, don’t worry. The package includes wire extensions and wire nuts specifically for this purpose.

Simply line up each wire extension with a doorbell wire and twist the wire nut clockwise until they’re securely connected.
-
Step 9: Connecting the Doorbell Wires
Now it’s time to connect the doorbell wires to the terminal screws on the back of your video doorbell. It doesn’t matter which wire goes to which screw, as long as they are properly connected and not touching.

Give the wires a gentle tug to ensure they are firmly attached. Once everything is connected, neatly feed all the wires back into the wall.
-
Step 10: Securing the Video Doorbell
Grab the provided screws and securely fasten your video doorbell in its designated location. Once it’s in place, remove the mini level and attach the faceplate. Start from the top and click it into place. This will give your doorbell a clean and finished look.
-
Step 11: Final Security Measures
To ensure your Ring doorbell stays in place, switch the screwdriver bit to the star-shaped end included in the package. Use this bit to secure your doorbell with one of the provided security screws.
Tighten the screw until it’s firmly in place. This extra security measure will give you peace of mind knowing your doorbell is secure.
-
Step 12: Power On and Enjoy!
You’re almost there! Now it’s time to turn the power back on at the breaker. Congratulations!
You have successfully installed your Ring doorbell. It’s time to enjoy the added peace of mind and security it brings to your home. Sit back, relax, and let your Ring doorbell take care of keeping an eye on your doorstep.
How to Install Ring Doorbell 3
Wired Installation
In this section, you will learn how to install a ring doorbell 3 to your existing doorbell system. So, let’s get started and make your home smarter and more secure!
-
Section 1: Checking Compatibility and Preparing the Doorbell
Before you understand how to install a ring doorbell 3, it’s essential to ensure compatibility and prepare the necessary components.
Compatibility Check for Your Doorbell Transformer:
To begin, verify that your doorbell transformer meets the specifications for the Ring Doorbell 3. It must supply eight to 24 volts AC at 50 or 60 hertz, with a maximum power rating of 40 volt amps.

If your transformer falls short, don’t worry! You have two options: installing a Ring Hardwired Transformer Kit or choosing the wireless installation method.
Charging the Battery:
Whether you decide to wire your video doorbell or go wireless, start by charging the included battery fully. Plug it into a USB port or power supply using the provided cable.

We strongly recommend fully charging the battery before beginning the installation. Once charged, look for only one LED light to be lit, indicating a full charge. Now, slide the battery securely into its compartment, listening for the satisfying click.
-
Section 2: Setting Up Your Ring Doorbell 3
Now that you’ve prepared the necessary components, it’s time to set up your Ring Doorbell 3 through the Ring app.
Opening the Ring App & Starting the Setup Process:
Begin by opening the Ring app on your smartphone or tablet. Follow the instructions provided in the app to initiate the setup process for your Ring Doorbell 3. The app will guide you through the necessary steps seamlessly.
-
Section 3: Installing Your Ring Doorbell 3
With the setup complete, it’s time to move on to the installation process of your Ring Doorbell 3.
Determining the Optimal Installation Height:
For optimal performance, it is recommended to install your video doorbell at a height of four feet from the ground.

If your existing wires are positioned higher than four feet, use the included wedge mount to angle it down for a better view.
Shutting Off Power & Removing the Existing Doorbell Button:
Before proceeding, ensure your safety by shutting off the power at the breaker. Remove the existing doorbell button from the wall and disconnect the wires.
Using the Mini Level & Marking the Installation Location:
Insert the provided mini level into the slot on your video doorbell. Use it as a template to mark the install location. Center the bubble on the mini level to ensure a straight alignment.

If you plan to install the doorbell on stucco, brick, or concrete, utilize the provided drill bit to create holes in your wall and insert the included anchors. Skip this step if you’re installing on wood or siding.
Wiring & Connecting Your Ring Doorbell 3:
Loosen the terminal screws on the back of your video doorbell. If your doorbell wires are too short to reach, use the included wire extensions and wire nuts to extend them.

Align each wire extension with a doorbell wire and twist the wire nut clockwise until they are securely connected.

Now, fasten the doorbell wires under the terminal screws, ensuring they are firmly attached and not touching. Finally, feed all the wires back into the wall.
Securing Your Ring Doorbell 3:
Secure your video doorbell using the provided screws. Remove the mini level and attach the faceplate, starting at the top and clicking it into place.
Switch to the star-shaped end of the included screwdriver bit and use it to secure your video doorbell with one of the included security screws.
Powering On & Finalizing the Installation:
Turn the power back on at the breaker, and voila! You have successfully installed your Ring Doorbell 3, bringing enhanced security and convenience to your home.
How to Install A Ring Doorbell Wired Without Existing Doorbell
Learning how to install a wired ring doorbell without an existing doorbell may seem like a daunting task, but with the right instructions and a few essential tools, it can be a straightforward process.
-
What You’ll Need
Before we begin, let’s go over the tools and equipment you’ll need for this installation:
- Ring Doorbell Wired: This is the main component of your setup.
- Transformer: You’ll require a transformer to convert the voltage from your outlet to the 24 volts needed by the Ring Doorbell Wired.
- Bell Wire: You’ll need some bell wire to connect the transformer to your doorbell.
- Wire: Depending on your setup, you may need additional wire to run from your desired installation location to the transformer.
- Metal Box: Consider mounting your setup in a metal box for added protection and durability.
-
Step 1: Understanding the Design
To start, let’s take a look at the overall design of the installation. We’ll begin at an existing outlet and tap off from there.
The transformer will take the 120 volts from the outlet and convert it to 24 volts, which is what the Ring Doorbell requires. We’ll use bell wire to connect the transformer to the doorbell.
-
Step 2: Running the Wire
Before we proceed with the installation, we need to run a wire from where you plan to install a doorbell to the location of the transformer.
This might be the most challenging part, but don’t worry, I’ll guide you through it.
If you recently replaced a door, you might already have a wire running down. Otherwise, you’ll need to run a wire through a drilled hole into your basement.
-
Step 3: Connecting the Transformer
In the basement, the wire from the doorbell will come out. The transformer serves as the meeting point for all the components.
We’ll start by working on the 120-volt side and then move on to the 24-volt side.
Connect the wire from the outlet to the corresponding wires on the transformer. Remember, black goes to the bronze screw, and white goes to the opposite side.
-
Step 4: Mounting the Transformer
To ensure safety and organization, it’s best to place the transformer in a metal box. This box should be mounted securely, with the wires coming out through a knockout hole. Use a plastic cap to protect the wire from any damage.
-
Step 5: Wiring the Doorbell
Now that we’ve connected the transformer, we can focus on the 24-volt side. Strip the wire and attach it to the appropriate terminals on the doorbell. Polarity is not crucial at this point, so simply hook up the wires.
-
Step 6: Powering Up and Setting Up
With all the wiring completed, let’s go outside and connect the Ring Doorbell. This is where we’ll need to set up the device in the Ring app on your phone. Scan the code and follow the app’s instructions. Make sure to connect the doorbell to your Wi-Fi network.
-
Step 7: Mounting the Doorbell
It’s time to install the ring doorbell on your desired location once your doorbell is connected. Use two screws to secure it in place, and attach the face cover.
-
Step 8: Testing and Configuring
Now that we’ve installed your Ring Doorbell, let’s check if it’s working properly. Open the Ring app to configure the settings according to your preferences.
You can enable Ring Alerts and motion detectors to receive notifications and keep your property secure.
Optional: Ring Chime
If you prefer a traditional doorbell sound, you can opt for a Ring Chime. This device will ring like a regular doorbell whenever someone presses the Ring Doorbell. I’ll include a link to the Ring Chime for your convenience.
Final Thoughts on How to Install a Ring Doorbell
Congratulations! You’ve successfully learned how to install a Ring Doorbell. It’s a straightforward process, especially if you have some basic wiring experience. Don’t forget to explore ring doorbell accessories to enhance its functionality and security features.
The most challenging part might be running the wire, but with patience and careful execution, you’ll have your doorbell up and running in no time.
Remember, safety should always be your priority during any electrical installation. If you have any doubts or concerns, it’s best to consult a professional electrician.


Pingback: How Does Ring Doorbell Work? | Meta Domotics
Pingback: 6 Best Ring Doorbell Chime Options in 2023 | Meta Domotics
Pingback: Ring Doorbell 4 vs Pro 2 | Meta Domotics