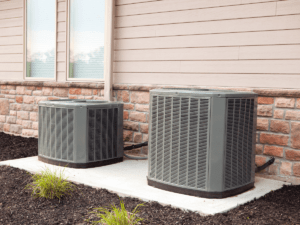
The portable air conditioner is a convenient way to cool down the room and can be moved from one place to another.
Its features are customer friendly and can be installed without help from a professional technician.
By following the manufacturer’s instructions, you can install the portable air conditioner in your homes.
In this article, we have discussed a series of general steps that need to be taken to install a portable air conditioner.
Steps to Install a Portable Air Conditioner
Select the location: Find the location for the installation of the air conditioner. The air conditioner requires some feet of space from the floor of the room.
Adjust the air conditioner near the window or sliding door so that it can vent the hot air from the room easily. If the air conditioner is near the window, more hot air is vented from the room.
If there is a drain vent tube or hose, you should place it at a place from where it will be possible to drain water in the tub or sink.
Adjust adapter kit: In the window adapter kit should create a good seal. Window needs to be trimmed if the size of the window is smaller than the adapter kit. If the size of the window is larger than the kit, plexiglass is used to fill the space.
Install the adapter kit: Once the adapter kit size is confirmed, it is time to install the adapter kit into the window. Screw it in place. You can use duct tape to seal it. This will help to avoid cool air seeping out the edges.
Set the ventilation hose: It is time to connect the ventilation hose to the window adapter kit. You need to make sure that it fits well. Wrap a piece of duct if it is a little loose.
Other end of the hose should be connected to the portable air conditioner. To connect the other end of the hose, use duct tape if needed.
Connect drain hose: If your portable air conditioner comes with a drainage hose, it needs to be attached to the unit.
You can drain the water with the help of this drain hose into the tub, bucket, tray, or sink. Secure the hose with duct tape so it can avoid any leakage of water.
Plug in the unit: Once you have installed the adapter kit and connected the drain hose, it is time to plug in the unit.
Find the switch near the air conditioner and plug in the unit. Make sure it is firmly connected to the switch. Turn on your air conditioner and enjoy the cooling.
Adjust Setting: Once the air conditioner is turned on, set the desired temperature of the air conditioner and the desired mode. Within a few minutes it will start cooling in the room. Enjoy the cooling.
List of Tools Required for Installation
- Cooler
- Drill
- Skill Saw
- PVC Pipes
- Duct Tape
- Batteries

Frequently Asked Questions
How does portable air conditioner work?
A portable air conditioner takes warm air from the room, cools it down, and releases it back into the room. The warm air left inside the air conditioner is exhausted outside the room with the help of a vent pipe or hose.
Can you install a portable air conditioner?
Typically, you can install a portable air conditioner on your own. The process of installation is straightforward if you are a bit tech savvy.
It does not require any professional technical assistance. Follow the manufacturer’s instructions provided for your model specifically.
Conclusion
Installation of an air conditioner is a manageable task and it can be done easily without any professional help.
By following manufacturer’s instructions and some key steps, you can install your air conditioner in your house effortlessly.
Don’t forget to choose a suitable location for the installation of the air conditioner. Install adapter kit in the window after adjusting it according to the size of the window.
Connect the vent hose and drain pipe correctly. Seal the hose with duct tape to avoid any leakage.


